Different software projects often necessitate different versions of python and different versions of dependencies.
The mutually exclusive nature of these requirements can be problematic, so it is desirable to have the capability of selecting specific combinations of packages and versions to suit the unique demands of a project.
This is exactly what a virtual environment can do. There are multiple ways to do this:
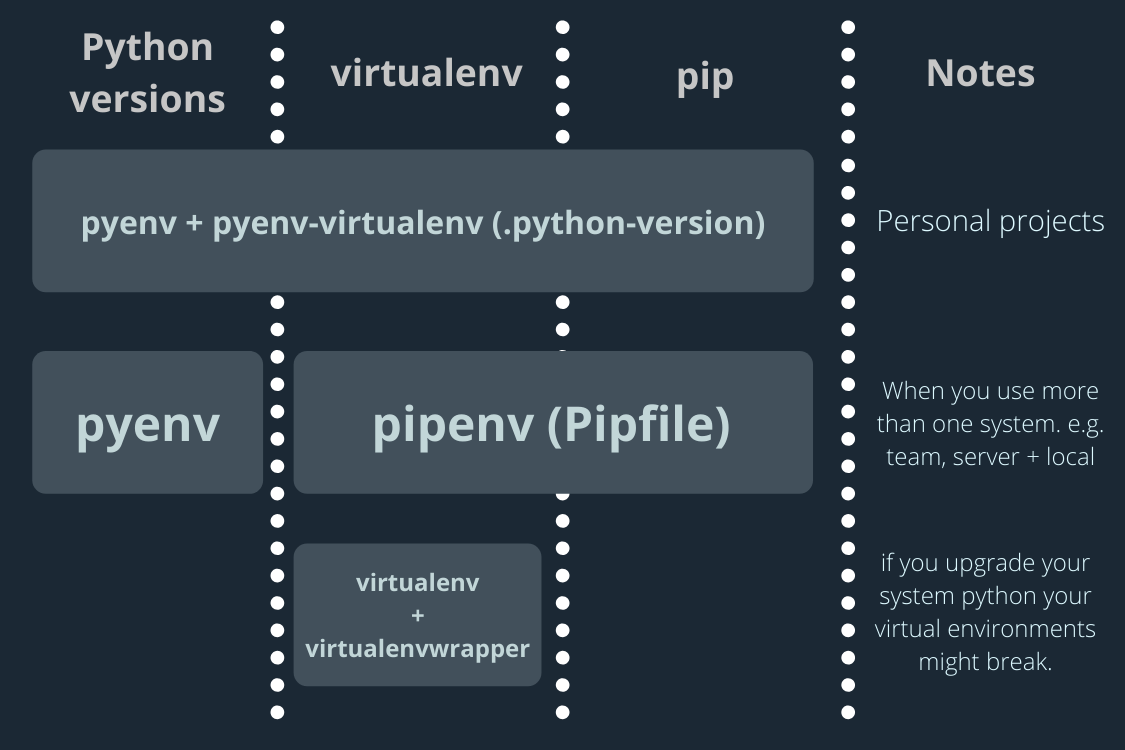
Image by Shinichi Okada
Some tools allow one to specify exclusively between python versions. Others allow one to specify exclusively between virtual environments.
Others allow one to do both. The tool that my tutorial discusses allows one to specify both a python version and a virtual environment.
This tool is , with the pyenv-virtulenv add-on.
Run the following installations with Homebrew:
$ brew install pyenv
$ brew install pyenv-virtualenv
Insert the following in the .bash_profile and .bashrc:
export PYENV_ROOT="$HOME/.pyenv"
export PATH="$PYENV_ROOT/bin:$PATH"
eval "$(pyenv init --path)",
eval "$(pyenv init -)"
eval "$(pyenv virtualenv-init -)"
export PYENV_VIRTUALENV_DISABLE_PROMPT=1
To install different versions of python with pyenv:
$ pyenv install [version] # e.g. pyenv install 3.9.10
To make a virtual environment, run:
$ pyenv virtualenv [version] [environmentName]
Example: $ pyenv virtual env 3.9.5 pyTest395
To associate a directory with a virtual environment:
$ pyenv local [environmentName]
To manually activate (or deactivate) a virtual environment:
$ pyenv activate [environmentName]
$ pyenv deactivate [environmentName]
To install a library for a virtual environment, be active in that virtual environment and run the following:
$ pip install [libraryName]
To get jupyter notebook going